Wednesday, 17 January 2018

G&SWR Brake Van construction complete.

G & SWR 16T Drummond brake van, construction complete.


I still have a few details to add to the interior of the van and I'll post some photos soon of this and of the busy underside too. The solebar needs a number plate, which I'll draw myself and print on the ink-jet and the inner compartment or guard's house will be glazed at a later stage. The roof is held in place by a screw mounted in the chimney which locates into the threaded pipe of the stove below. In the doorways you can see evidence of yellow-grey Milliput which has been used to fill the uprights which inexplicably narrow above the safety bars. As I made the uprights from hollow section metal, filing them to shape removed one side and revealed the hollow inside, hence the filler. The lower footboard has been thickened to a more realistic thickness and the centre footboard support has been strengthened with a wire soldered behind it.

The buffers are from my spares box and are internally sprung which I prefer to the piano-wire system supplied with the kit. Couplings are made by myself from 1.25 mm n/s for the hook and 0.8 n/s wire for the links, making my own ensures that I can arrange a shank to match the slot in the buffer beam and sidestep any problem that may arise due to the incompatibility of the coupling hook casting and the buffer beam slot. I've arranged that the couplings are sprung with a stiff spring, though I'm no great believer in sprung couplings, the main benefit being that they can be easily removed at the painting stage. I've already blackened the couplings and buffer rams with Birchwood Casey brass black and intend to keep up the momentum and spray the van with Acid 8 etching primer in the shed as soon as the weather improves in the far NW.

You can just glimpse the guard in this picture leaning out of the van on the side of the brake wheel, he's from the "Heroes of the Footplate" range now produced by Invertrain though I've changed his cap to something suitable for a G & SWR guard. The tail lamps, of which you can see only one of the three in position, are from the same source.


Friday, 5 January 2018

G & SWR Brake Van More Progress

G & SW Railway 16T Drummond Brake Van interior

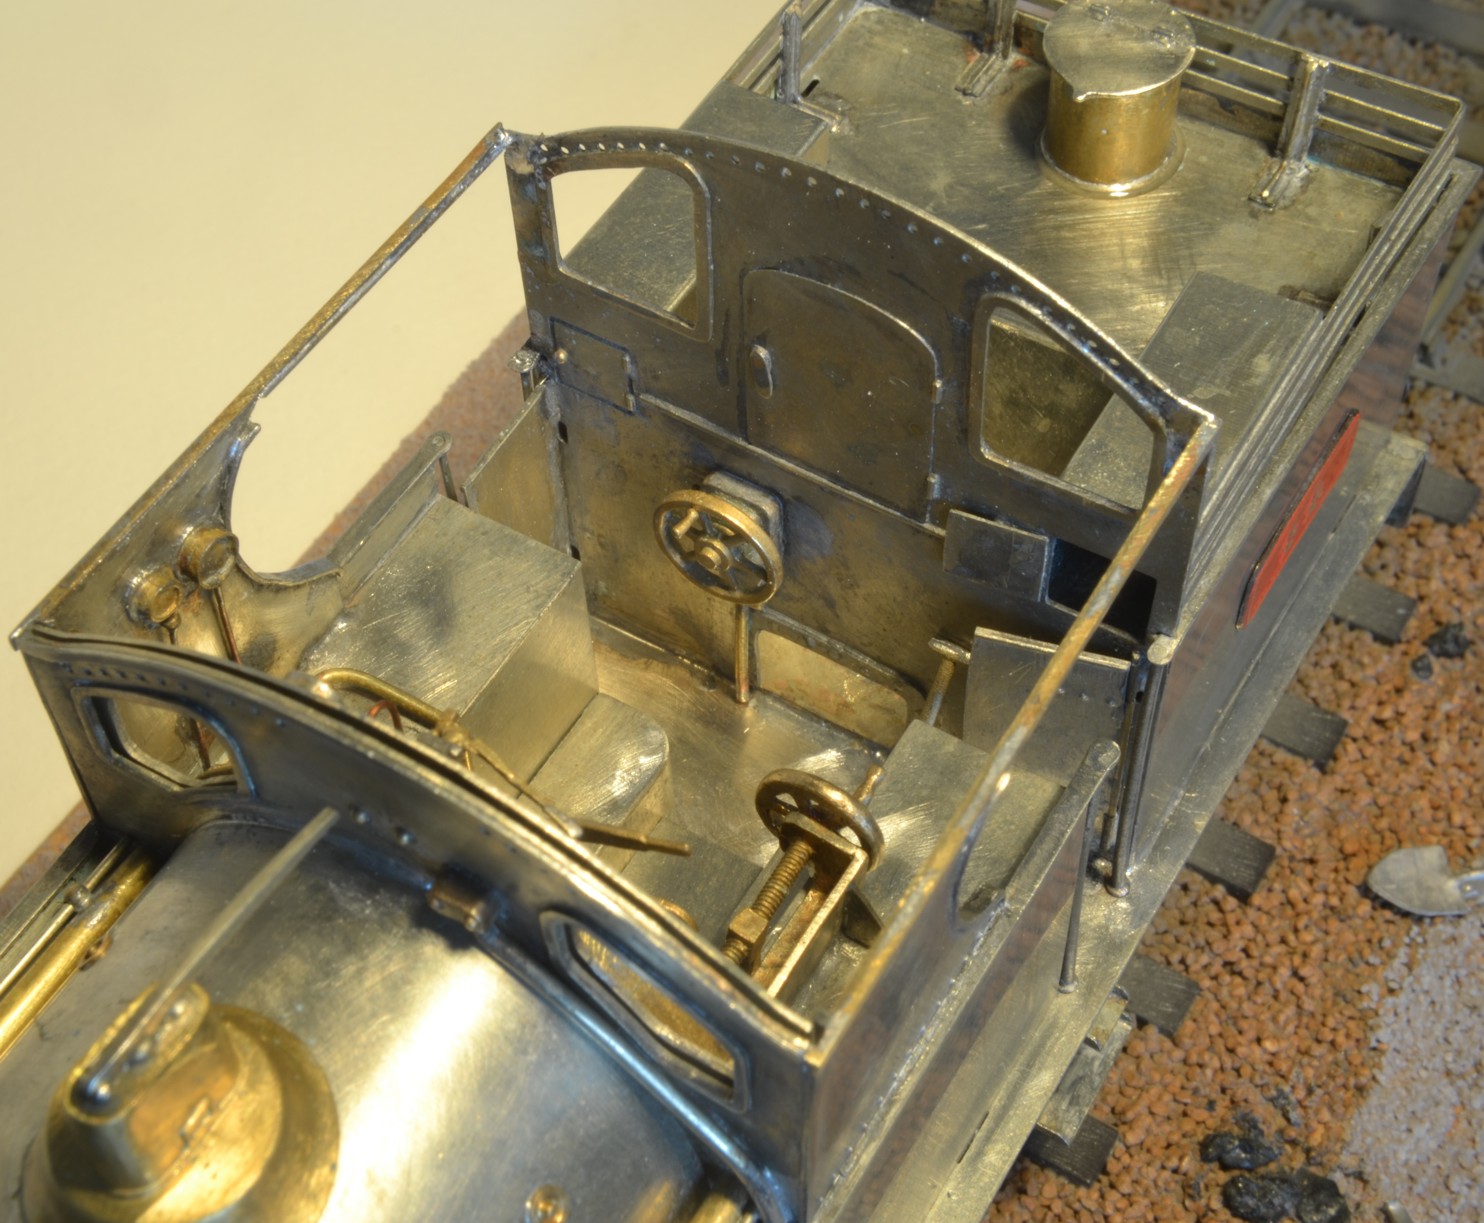
The interior furnishings of the brake van are in place now so the superstructure is almost complete. The stove is screwed in place from beneath and I plan to put a screw down the chimney and into the stove pipe to fix the roof in place. In the corner is a locker complete with hinges and a lock which sits between the inner wall and the guard's lookout seat. The brake mechanism and inside brake wheel take up the near corner of the van as seen in this view, though not yet in place I have castings for this that I made for a CR van. A high desk in the corner opposite the locker completes the furnishing. There is ample scope for more incidental details, a sweeping brush, a bucket of coal, a lamp and maybe the guard's log book and pencil and of course the guard himself.


Interior details of safety bar and locker. 

In this view you can see that the safety bar across the open veranda is in fact an articulated hasp and staple arrangement, the workings of which are not apparent from outside. A top rail needs to be added to the van interior to complete the inner structure.
There's not much space inside now that the van is furnished for parcels or small consignments of goods and I'm not sure that these vans carried them, if they did they'd have to be small!

Tuesday, 26 December 2017

G & SWR Brake Van Progress

G & SWR Drummond Brake Van interior. 

I've completed the bracing structure on all the interior walls of the van now though the panelled doors are still under construction. The bracing struts are made from 2mm square hollow section brass and there are a lot of them. The floor of the guard's "house" is not part of the kit though the verandah floors are included. I made the inner floor from an etched wagon floor that I had left over from a previous project, this slides into place under the bottom of the inner bracing struts and is supported from below on spacers so it's on the same plane as the verandah floors.  I'll illustrate the underside of the van at a later stage to clarify this.

The doors are not glazed and I have no information on their inner surfaces so I'm panelling them in much the same way as the front. I've made a writing desk for one corner and a locker with a hinged lid for the opposite one. Lookout seats are under construction and the brake mechanism and handwheel will fit into a third corner; the fourth, being of restricted width because of the offset brake end door will remain empty. The kit itself is fairly compliant, it's not fighting back despite not being designed with an interior in mind, though the wheels caught on the underside of the superstructure when I tried them in place today. I cut out slots to ease the problem which would have been an easier task at an earlier stage before I'd half assembled the van.

In a gesture of generosity towards myself, in a moment of levity brought on by the approach of Christmas, I purchased from Andy Copp at Lochgorm Kits a set of etches and castings to build a HR d.24 brake van... so watch this space for details of the build in the New Year.


Interior detailing work in progress, desk and lookout seat in place.

Sunday, 17 December 2017

G & SWR 16ton Drummond Brake Van.

G & SWR 16ton Brake Van from a Taff Vale/Dragon Models /Celtic Connection kit

I took these pictures on my new iPhone tonight to show the model taking on a three dimensional presence at last as I've been working in the flat on the components for the last few weeks. The kit is not really designed with an interior in mind, it provides no help so, as an interior is my main concern with this model, I've been finding it hard work. The van is a single-skin affair so the internal bracing struts are a feature of the model not only inside the guard's "house" but also on the verandahs where all the edges have had 2mm square brass section added, in a similar manner to the real thing, to give solidity to the structure. The inner partitions are likewise braced with square section as can be seen best in the upper photo. I have no specific G & SWR reference for a guards van interior so I'm basing the detail on what seems most likely, using other similar verandah-both-ends vans as exemplars.
I'm going to complete the basic structure of the van now, sides, interior partitions and floor and then add the rest of the interior to include the lookout-seat, brake mechanism, stove, locker and desk.
I've sourced some cast brass lamp irons from Slaters, these are not shown on the drawing but are clearly to be seen on the only photo I have of the van. This photo was supplied by the G & SWR Society and shows the vehicle in LMS days; I have no photo of it in earlier pre-grouping guise, only the drawing that came with the instructions.


Interior detail beginning to take shape.


Some guards vans were of single skin construction similar to the G&SWR van under construction, however others had a double skin, planks being fastened to the inner bracing struts to form the double skin. If the outer cladding was vertical the inner would usually be horizontal.

Friday, 24 November 2017

Cambrian Machinery Wagon

Cambrian Railways 10 Ton Machinery Wagon.

This wagon, called a "Roll Wagon", in the Dragon Models catalogue was built some time ago and stood neglected, though not alone, in the sidings of despond until this week when I decided it was high time I cleared some of the backlog and did some painting. The etched wagon plate that came with the kit had a number but no lettering to identify it as a Cambrian Railways wagon, so I made one myself.

The most difficult part of this task was drawing the letters to conform to the oval shape of the plate and it was only on my second attempt that I achieved a reasonable result. I could not find an example of a preserved Cambrian wagon plate so I took the etched one supplied on trust and used it as a guide.

The wagon cries out for a load and I'm thinking about this now. I bought a Fordson F tractor from Universal Hobbies with this wagon in mind but it's not one of their best models. I have a Duncan Models kit for a Portable Steam Engine in the cupboard which would make a much better load though it would be a far more time consuming project.


M & G N Roll Wagon with portable boiler load c.1920

The above photo is copyright of the National Railway Museum & SSPL... here's a link to more photos on their site...

 http://www.nrm.org.uk/ourcollection/photo?group=Derby&objid=1997-7397_DY_11517

Thursday, 16 November 2017

Precursor Tank details

LNWR Precursor Tank No.44 c.1906

LNWR 44 was built from a Taff Vale/Dragon Models kit with many improvements and additional detail. Ample motive power is provided by an MSC Models motor and gearbox with 3 stage 40:1 helical gears. The completed engine weighs in at just over 1kg with space for more weight if necessary. I intend to test run her with a reasonable load at the Running Day next weekend on the Carlisle club layout. The cab interior is finished now so construction of the engine is complete.


LNWR 44 cab interior detail

I did not have a GA drawing to help with details of the cab interior, I don't think one exists,  so I've done my best with what information I have been able to glean from a variety of sources. I could have added more but restrained myself from filling the cab with dubious or speculative details. The cab rear spectacle plate features a coal hole at footplate level, access doors to the coal space and tool boxes and a brake wheel, note also the opening cab doors. All components are brass or nickle-silver, either sourced from LGM or made by myself, no white metal was used in the construction.


LNWR 44 Cab interior and backhead detail.


The backhead and front spectacle plate are a unit and can be removed for painting; the glazing slides between the inner and outer spectacle plates. The bottoms of the windows are six feet above footplate level so the crew needed some means of levitation to see out of them. The model's interior step arrangement is based on that of the LNWR Bowen-Cooke 4-6-2T which was introduced only four years after George Whale's Precursor Tank and which has a cab of comparable proportion and fortunately for which a GA drawing exists. The GA shows that the coal hole and shovelling plate of the Bowen Cooke engine was well above footplate level, a novel innovation which eased the fireman's task. I suspect that George Whale may have had a similar consideration for his crews, however the designer of the Precursor Tank kit thought otherwise so I 've deferred to his judgement in this case and left the coal hole at footplate level.

Contemporary photos of crew working in these engines confirm the existence of the interior step arrangement which served to elevate them well above footplate level and enabled them to see ahead through the cab windows.

The roof of the model slots into place and can be removed to facilitate painting and later examination of all the interior detail.


Exterior of cab of LNWR 44 with door open and showing some interior detail
 

LNWR 44 smokebox and buffer beam details


The removable lamps have brilliants set into them, clear to the front and red behind. The author's nickle-silver smokebox door replaces the white metal casting supplied in the kit. There are a large number of tiny brass rivets replicating the real thing in the hinges of the "piano front" and larger bolts can be seen on the bottom of the smokebox wrapper, these tiny brass fittings are inserted into holes and soldered in from behind.

Wednesday, 15 November 2017

G&SW timber wagons painted.

G & SW 10ton swivel bolster wagon.

My attempts at printing a number for the wagon and a "To Carry..." plate to fit inside the raised edges of the etched plates that came in the kit just didn't work, the paper rectangles didn't fit properly and looked scrappy. So I removed the metal plates and replaced them with printed paper ones which I glued to thin Plastikard sheet to give them more body, the effect was much improved.

My artwork was for number 12783 which is the only register number known for these wagons, it didn't take long to substitute a "2" for a "3" to produce a different albeit speculative number plate for the second wagon which was then scanned, sized and printed to produce the plate. The smaller plates, "To Carry 10 Tons" were produced similarly ; the tare or weight of each wagon appears on the bottom plank under the "G".


Nos. 12782 and 12783 paired together.


The colour used to paint these wagons is my own interpretation of the G & SW's light grey goods livery. All below the solebar is spray painted, all above is painted by hand, in both cases with enamel paint ; transfers are HMRS Pressfix. A light weathering mix has been airbrushed from below which unifies the colour scheme and helps to tone down the bright white of the transfers and number plates.


Sketchbook page with hand-drawn artwork for number and load plates