Thursday 26 December 2019

Dunrobin, Making a Start.

Dunrobin frames under construction

Lochgorm Kits' 7mm kit for Dunrobin, the duke of Sutherland's private engine, was I believe designed originally in 4mm scale by Alastair Wright of 5522 Models and enlarged to 7mm by the late Andy Copp when he took over production of the former's Highland Railway kits in 2011. Alastair began introducing Highland Railway designs to his range in the 1980's; these were hand drawn and, though not designed for 7mm, when enlarged they served well enough though they took their faults with them to the larger scale and magnified a number of these, so some of the etched parts of this kit need to be remade with more accurate replacements.

The chassis (above) is etched in sturdy 0.7 nickel silver and the frames are a respectable 26.4 mm outside diameter so I had to file a bit off the frame bushes to free the wheels. I've introduced a few more cross-members for the cylinder front and rear and for the ash pan. I've ordered an ABC Gears' Pug Special gearbox with a Canon 16 x 20 motor which I think should provide enough power for this little engine. It will sit upright in the firebox and drive the rear fixed driving axle.

Rear bogie complete

The bogie builds well without much modification and is a solid job. I used Slaters' 1/8" frame bushes for the axles. I plan to mount wiper pick-up wires behind the left hand wheels and short out the wheels on the other side; I'll try silver conducting paint and see if that works.


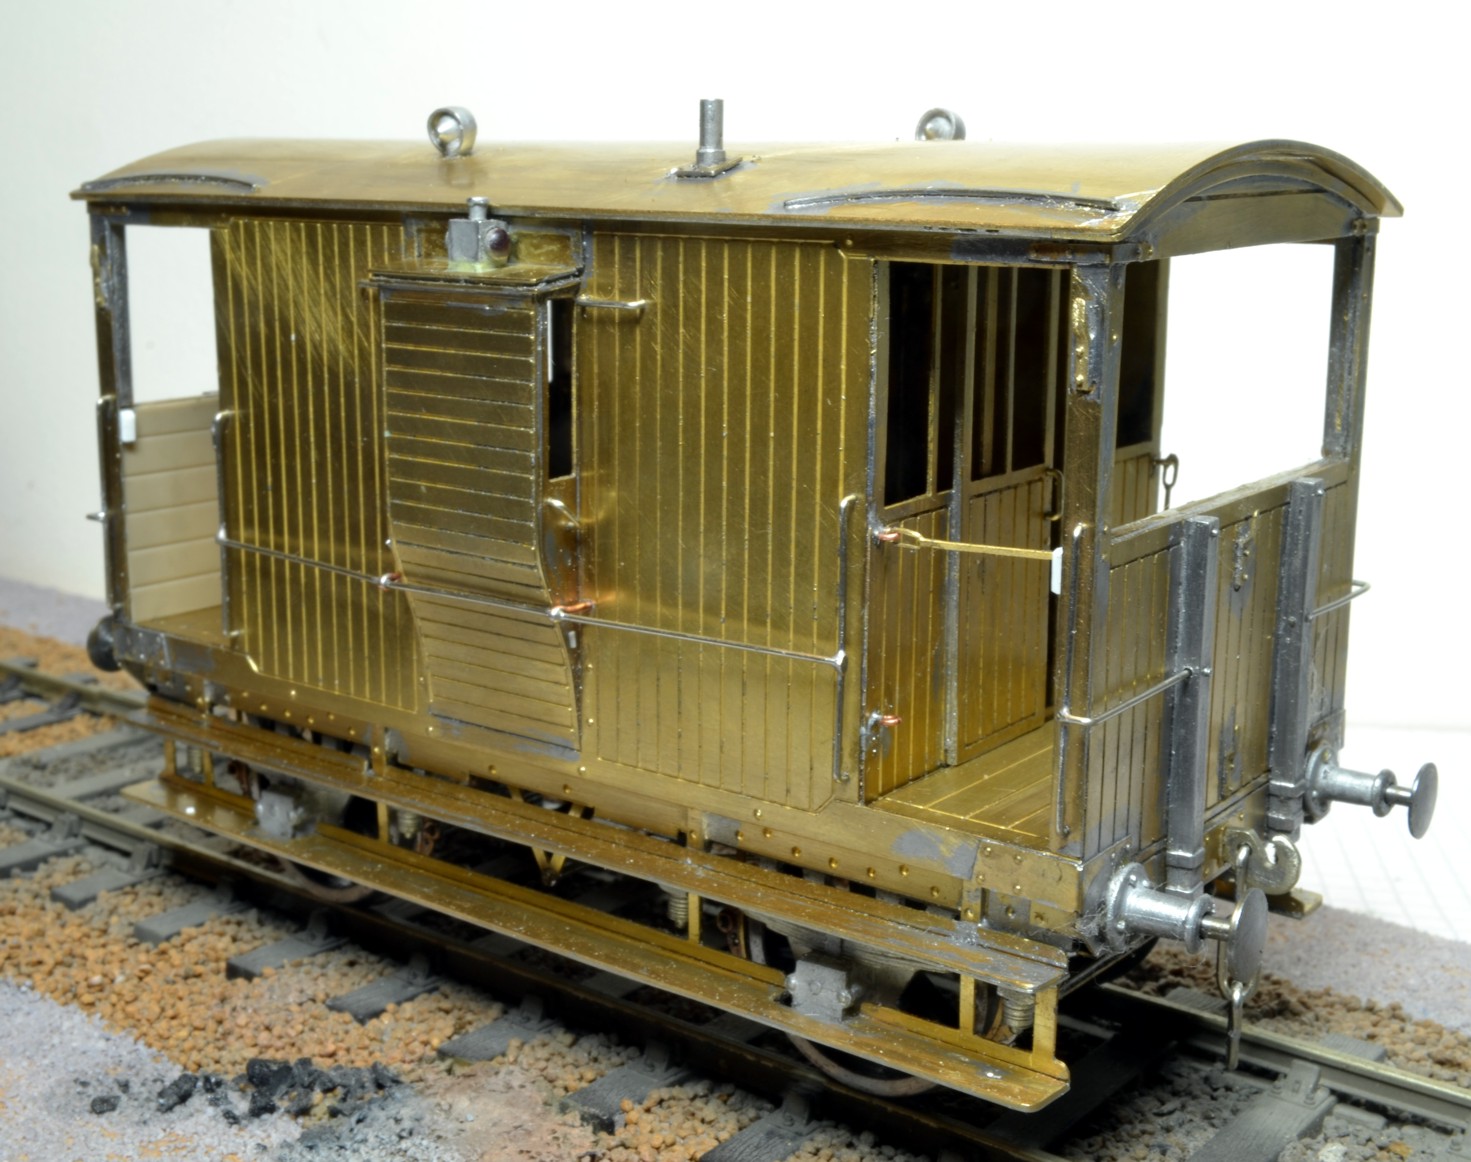
The superstructure is built on a flat wooden former. 

The boiler in the kit was half-etched to provide boiler bands, which resulted in a flimsy structure, this inadequacy when compounded with a mistake in the diameter of the boiler condemned the offending part to the recycling bin. The front splashers were found to be undersize and new parts were made to replace these too.

I intend to double-skin the cab all round so the acetate glazing will slide between the outer and inner skins; in addition the inner sliding cab windows will be constructed in this manner too. The cab front and rear present no problem though the cab sides will be replaced with more accurate parts to facilitate my ambitious glazing scheme.

Currently the real Dunrobin is undergoing major reconstruction, so there's nothing of her to see at Beamish, her home, though their newsletter is helpful and charts progress. I intend to build a detailed cab interior, though it's going to be some time before I get to this stage, I hope that by then I'll have more information on this aspect of the engine. At the moment some details, particularly of the backhead and controls, are rather hazy.

Photos taken on an Apple I-Phone 11.

Saturday 7 December 2019

Two NER Goods Brake Vans.

NER V1 Brake Van from the low end. Note the chunky couplings, position of the end hand-rails and the roof hand-rail.

These NER goods brake vans are both from kits by Connoisseur Models, designed by Jim McGeown, and though they build well I have made a few changes and improvements to them which I detail here.
I had to hand Ian Sadler's book "NER Brake Vans" and used the photos and drawings as reference...

I removed the front panel from the centre of the topcote as I found no evidence for it.

The position of handle of the left hand side door was wrong and was changed as the doors slid only one way, towards the low end.

The end hand-rails were soldered into the sides of the vertical end baulks rather than into the front of them.

I replaced the feeble coupling hooks supplied with more chunky ones I made myself from 1.25mm nickle silver sheet.

I made a floor for the van and arranged a long screw through it to hold the roof in place.

Some metal was removed inside the topcote to add realism and an inner cross wall added which strengthens the structure.

Underneath the van I made an elbow which links the brake yokes and supports the rod to the central brake pivot.

I added a roof hand-rail on the low end though it is not soldered to the end, so the roof remains removable.

I didn't use Jim's method of springing the buffers and coupling; these are individually sprung.

4mm scale hand rail knobs were drilled 6mm and support the side hand rails.


NER V1 Brake Van from the birdcage/topcote end

Underside details are similar for both V1 and V4 vans. Note the elbow joining the brake yokes and the individually sprung buffers and coupling

Interior of V1 Brake Van with cross-wall. Much metal was removed from the top edge of the sides inside the top cote.


The photos in Sadler showed that the side lamp should be positioned on the roof of the side lookout, so the bracket supplied in the kit was dispensed with.

Inside veranda ends were made from Slaters' Plastikard planking.

I soldered metal strip to the roof edges and to the footboards to beef them up to a more realistic thickness.

Square tube was added to the veranda corners to simulate the thickness of these uprights. The door was made in the open position; this is the rear of the van where the guard figure will be positioned later. I made a pattern for an NER brake van lamp which will be produced by Invertrain next year; a trio of them will ultimately grace the rear of this van.

A floor was added and drilled for a long screw, which passes through the floor to hold the roof firmly in place.

The etched veranda safety bars are fragile and rather vulnerable so I modelled only one in place across the entrance, the others are held in their housings.

Lamp irons are from Slaters as I found the etched ones supplied just didn't work.

An etched number plate has been commissioned from Guilplates. NER lettering and numbers for the sides will be a mixture of transfers from various sources, which I hope I can make work together. 

NER V4 Brake Van. The couplings are made by myself; the buffers are independently sprung. 

NER V4 Brake Van. Note the safety bars in two positions. The lamp on top of the side lookout has been improved with a realistic red epoxy lense. 


NER V4 Brake Van from the rear/open door end. The guard figure has yet to be added to the veranda. Note the Plastikard inner planking of the front veranda. NER pattern brake van lamps will be available from Invertrain soon, to add a final flourish to the van.