 |
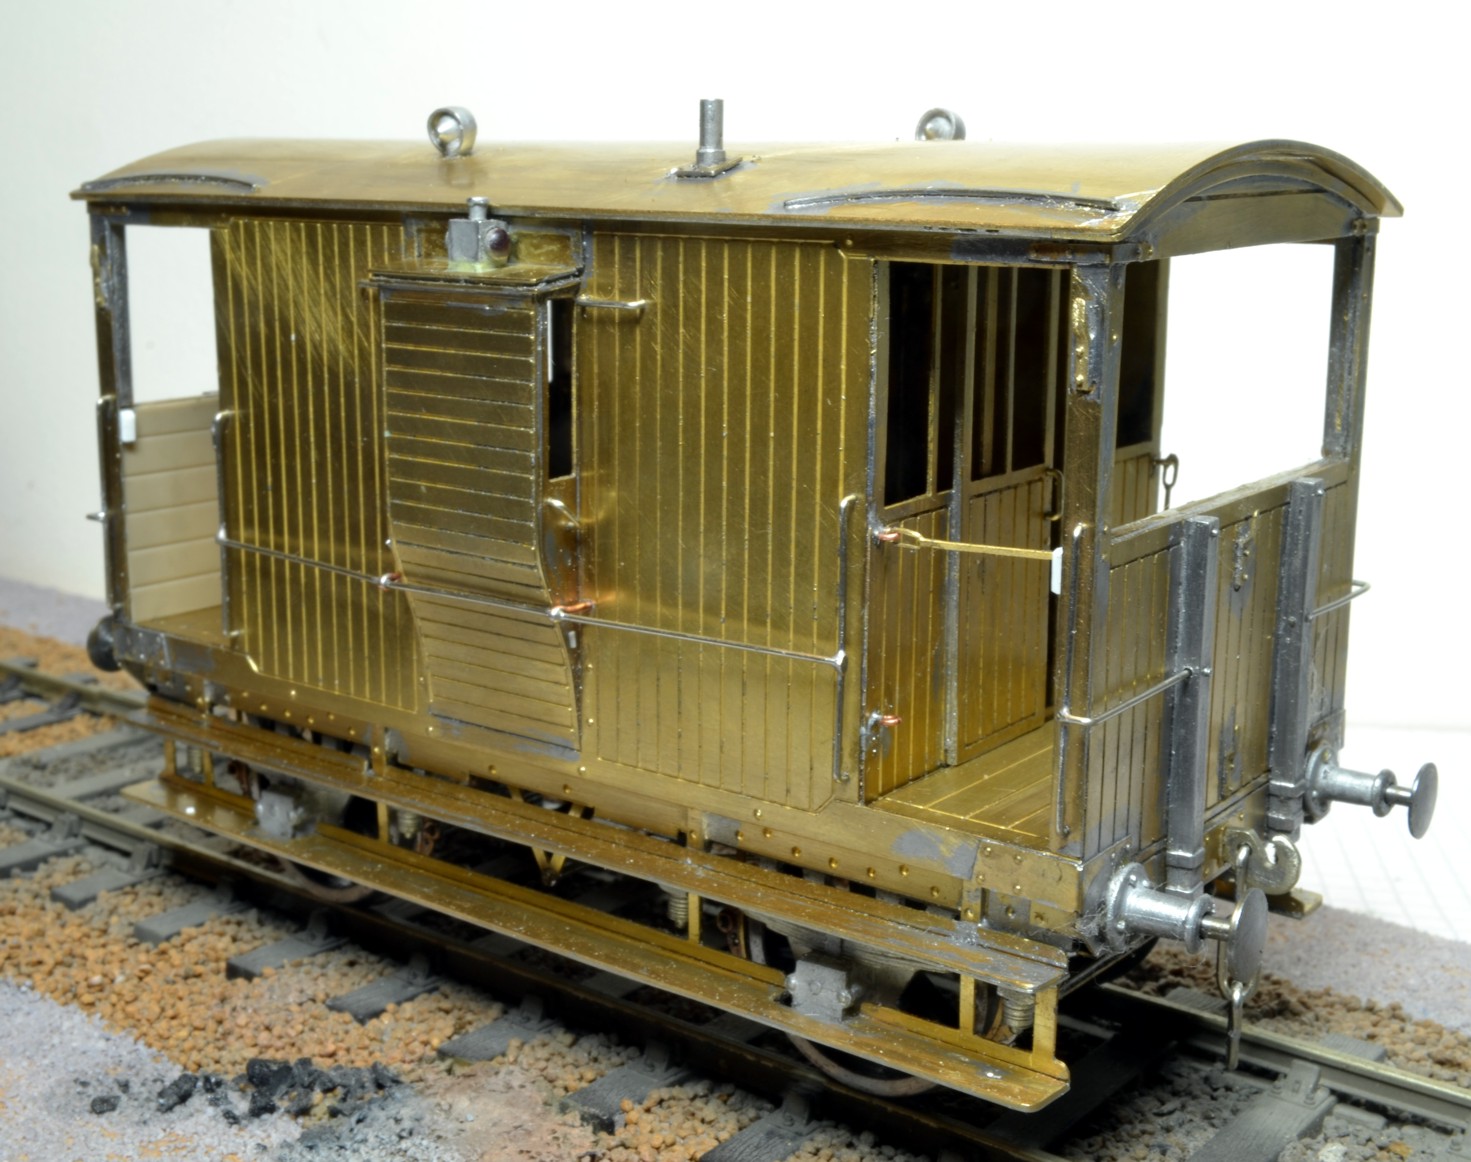
| NER V1 Brake Van from the low end. Note the chunky couplings, position of the end hand-rails and the roof hand-rail. |
These NER goods brake vans are both from kits by Connoisseur Models, designed by Jim McGeown, and though they build well I have made a few changes and improvements to them which I detail here.
I had to hand Ian Sadler's book "NER Brake Vans" and used the photos and drawings as reference...
I removed the front panel from the centre of the topcote as I found no evidence for it.
The position of handle of the left hand side door was wrong and was changed as the doors slid only one way, towards the low end.
The end hand-rails were soldered into the sides of the vertical end baulks rather than into the front of them.
I replaced the feeble coupling hooks supplied with more chunky ones I made myself from 1.25mm nickle silver sheet.
I made a floor for the van and arranged a long screw through it to hold the roof in place.
Some metal was removed inside the topcote to add realism and an inner cross wall added which strengthens the structure.
Underneath the van I made an elbow which links the brake yokes and supports the rod to the central brake pivot.
I added a roof hand-rail on the low end though it is not soldered to the end, so the roof remains removable.
I didn't use Jim's method of springing the buffers and coupling; these are individually sprung.
4mm scale hand rail knobs were drilled 6mm and support the side hand rails.
 |
| NER V1 Brake Van from the birdcage/topcote end |
 |
| Underside details are similar for both V1 and V4 vans. Note the elbow joining the brake yokes and the individually sprung buffers and coupling |
 |
| Interior of V1 Brake Van with cross-wall. Much metal was removed from the top edge of the sides inside the top cote. |
The photos in Sadler showed that the side lamp should be positioned on the roof of the side lookout, so the bracket supplied in the kit was dispensed with.
Inside veranda ends were made from Slaters' Plastikard planking.
I soldered metal strip to the roof edges and to the footboards to beef them up to a more realistic thickness.
Square tube was added to the veranda corners to simulate the thickness of these uprights. The door was made in the open position; this is the rear of the van where the guard figure will be positioned later. I made a pattern for an NER brake van lamp which will be produced by Invertrain next year; a trio of them will ultimately grace the rear of this van.
A floor was added and drilled for a long screw, which passes through the floor to hold the roof firmly in place.
The etched veranda safety bars are fragile and rather vulnerable so I modelled only one in place across the entrance, the others are held in their housings.
Lamp irons are from Slaters as I found the etched ones supplied just didn't work.
An etched number plate has been commissioned from Guilplates. NER lettering and numbers for the sides will be a mixture of transfers from various sources, which I hope I can make work together.
|
 |
| NER V4 Brake Van. The couplings are made by myself; the buffers are independently sprung. |
 |
| NER V4 Brake Van. Note the safety bars in two positions. The lamp on top of the side lookout has been improved with a realistic red epoxy lense. |
 |
| NER V4 Brake Van from the rear/open door end. The guard figure has yet to be added to the veranda. Note the Plastikard inner planking of the front veranda. NER pattern brake van lamps will be available from Invertrain soon, to add a final flourish to the van. |
No comments:
Post a Comment